


If you’re dealing with drafts, fog between the glass, or rising energy bills, In that case, DIY window seal repair can fix all three problems. A failing seal is usually the reason behind them, even if the window still looks fine from a distance. Many times, it’s easier to fix it yourself than people think, as most of the tools you need are already at your local hardware shop. Below, you’ll find how to spot the signs, seal the frame yourself, and know when it’s time to call in a pro instead.
Signs Your Window Seal Is Broken
Most of the time, a broken window seal takes time to happen. It usually starts small, and most homeowners miss the early warning signs until the problem gets worse. Here’s what to watch for:
- Fog or moisture between the glass panes. It is the most common sign. It means the seal has failed and let air in
- Drafts near the window frame, even when it’s closed
- Higher heating or cooling bills than usual, often the first thing homeowners notice before spotting the draft itself
- Cracked or missing caulking around the frame
- A window that feels stiff or uneven when opening or closing
- Water stains on the sill after it rains, meaning moisture is getting past the seal.
What You’ll Need for a Window Seal Repair Kit
Before you start the repair process, make sure you have everything you need. Having your tools and materials ready will make the job easier. A basic window seal repair kit usually includes:
- Silicone or acrylic caulk, made for window and glass use
- A caulk gun to apply it evenly
- A utility knife or scraper to remove old and cracked sealant
- Painter’s tape to keep lines clean
- A clean cloth and rubbing alcohol to wipe down the frame before sealing
- Replacement weatherstripping, if the seal around the frame (not the glass itself) needs replacing
DIY Window Seal Repair- Sealing Window Frames from Outside
The outside of your window frame is the part that gets wet, windy, and changed weather. That’s why it is important to seal the outside of your window frames if you don’t want leaks and drafts in the future. Here’s how to do it step by step:
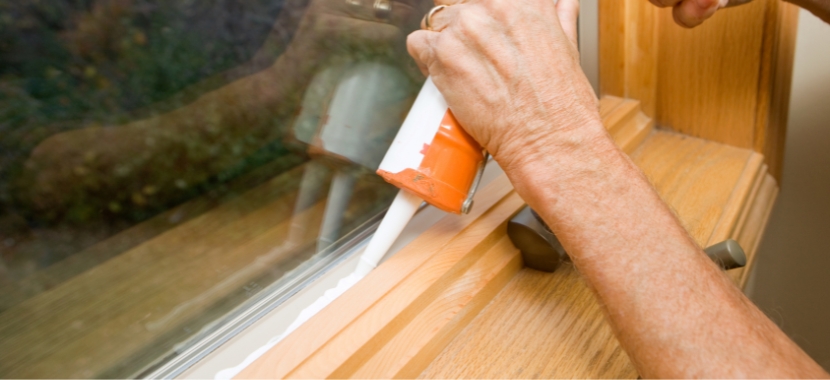
Step 1: Remove the Old Caulk
Use a utility knife or scraper to remove the old, cracked, or peeling sealant. Work slowly along the edges to avoid scratching the window frame or glass.
Step 2: Clean the Frame
Once the old caulk has been removed, wipe the area with a clean cloth and rubbing alcohol to remove dust, dirt, grease, and any remaining residue.
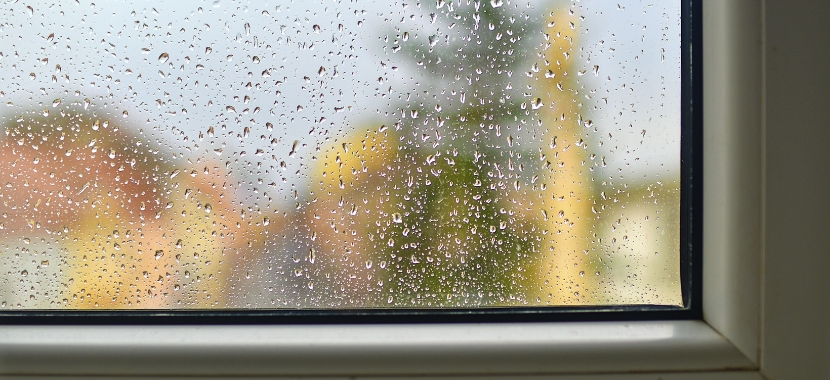
Step 3: Check the Weather
Apply exterior caulk only in dry and mild weather. Always avoid sealing windows during rain, high humidity, or freezing temperatures, as these conditions can prevent the sealant from curing properly.
Step 4: Apply Painter’s Tape
After the surface is clean and dry. Use painter’s tape to line the frame’s edges so that your glue line stays straight.

Step 5: Apply New Sealant
Load your caulk gun with an exterior-grade silicone sealant, as it holds up better against rain and sun than standard caulk. Always keep the gun going at the same speed as you run a steady, even bead along the gap.
Step 6: Smooth the Bead
Use a wet finger or caulk tool to smooth the sealant over before it starts to skin over, so it seals tightly against both surfaces.

Step 7: Remove the Tape
Carefully peel off the painter’s tape while the caulk is still wet. Taking it off before it dries will help keep the edges clean.
Step 8: Let It Cure
Allow the caulk to cure for the time recommended by the manufacturer. Most silicone sealants need at least 24 hours to cure fully. During that time, avoid touching or exposing the area to rain.
Sealing Window Frames from Inside
While the outside of your window frame deals with weather, the inside is where drafts and energy loss show up first. Sealing window frames inside helps keep conditioned air where it belongs. Here’s how to do it, step by step:
Step 1: Remove the Old Seal
Use a utility knife to carefully cut away the old caulk or weatherstripping along the frame. Work slowly near the glass to avoid scratches. Removing it completely makes sure nothing gets left behind that could stop the new seal from sitting flush.
Step 2: Clean the Surface
Once the old seal has been removed, wipe the window frame with a clean cloth and rubbing alcohol to remove dust. A clean surface helps the new caulk or weatherstripping stick properly, so it stays in place longer.
Step 3: Apply Painter’s Tape
Once the surface is clean and dry, use painter’s tape on both sides of where the window frame meets the wall or trim. This will keep your caulk line straight and make cleanup easier once you’re done.
Step 4: Apply Sealant or Weatherstripping
For gaps around the fixed part of the window frame, apply a thin, even bead of interior-grade caulk. If you’re sealing the areas where the window sash meets the frame, replace the old weatherstripping instead because caulk can crack once the window starts moving again.
Step 5: Smooth and Check
If you used caulk, smooth it with a gloved finger before it sets. If you used weatherstripping, close the window and make sure it creates a snug seal without making the window difficult to open or close.
Step 6: Remove the Tape
Carefully remove the painter’s tape before the caulk dries, ideally within 10 to 15 minutes after applying it. If you wait too long, the dried caulk may stick to the tape and pull away. Once the tape is off, let the window sit undisturbed while the seal cures completely.
When DIY Isn’t Enough (Call a Pro)
Once you’ve resealed your window inside and out, most minor issues should clear up for good. However, some window seal issues can’t be fixed with caulk. If you’re seeing fog or moisture trapped between the glass panes, that usually means the seal has failed inside the glass unit itself, not the frame.
At that point, window glass replacement is typically the only real fix, since no amount of resealing from the outside can restore a broken seal between the panes. The same goes for a seal that keeps failing shortly after you’ve repaired it, which often points to a deeper issue than surface-level caulk can solve.
You should also consider calling a professional if:
- Water continues to leak around the window even after resealing
- The frame itself is warped, soft, or visibly damaged
- The window no longer closes or seals properly
In situations like these, it’s best to have the problem looked at by a professional instead of guessing at a fix. A quick search for window seal repair near me can point you to someone who can properly diagnose the issue before it gets worse. If you’re in the area, Aron Windows & Doors can take a look at your windows and let you know exactly what’s going on, whether that’s a simple reseal or a full glass unit replacement.
Final Thoughts
Now you know how to spot a failing window seal, what to gather before starting, and how to reseal it from both sides. You also know when a simple DIY repair is enough and when it’s best to call a professional. That’s all!. With the right prep and a bit of patience, your windows can be sealed up tight again in no time.











1 Comment
Seasonal Window Maintenance Tips - Aron Windows
[…] you catch the problem early, our DIY window seal repair guide explains how to handle small seal issues at home. But if the glass is heavily fogged or […]