A garage door sensor problem can turn a simple daily routine into an annoying issue. You press the button, expect the door to close, and then it stops. This usually happens because the sensor system is not getting the signal it needs. These sensors are more than a small part near the bottom of the door tracks. They are part of the garage door’s safety system.
In this guide, you will learn how to spot common garage door sensor problems, what simple checks you can try first, and how to fix garage door sensor. You will also learn when the problem may need professional help instead of another DIY fix.
Common Signs Your Garage Door Sensor Is Malfunctioning
If your garage door isn’t working right, the problem could be with the sensors. Here are a few signs that your sensors might be the issue:
- The Door Won’t Close Properly: Have you ever tried to close your garage door only to have it stop halfway or not close at all? This is generally caused by sensor problems. Even something as small as dirt, leaves, or a cobweb can block the sensors. The sensors are designed to stop the door if they detect something in the way, so when there’s an obstruction, the door just won’t close.
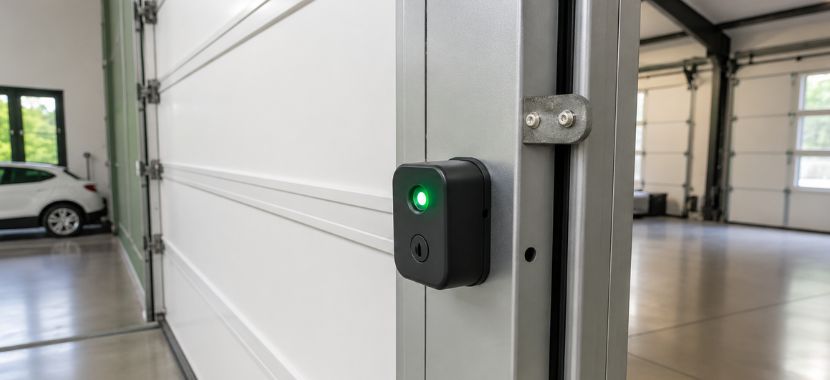
- Blinking Lights on Sensors: Check the lights on your sensors. If they’re blinking, it’s a sign that the sensors aren’t aligned properly or there’s something in their line of sight. This is one of the easiest issues to spot, and fixing it usually just requires a little adjustment.
- Inconsistent Operation: Does your garage door work fine some days but not others? If it opens and closes sometimes but then stops unexpectedly, it’s likely a sensor issue. This can happen because of misalignment, dirty lenses, or even issues with the wiring. A quick check could save you a lot of trouble.
- The Door Reverses Before Touching the Ground: If your garage door starts to close but then reverses before it even touches the ground, it’s probably the sensors at fault. This happens when the sensors are blocked or malfunctioning.
Step-by-Step Guide: How to Fix Garage Door Sensor
A garage door sensor problem can be annoying,g but before you worry about a bigger repair, take a closer look at the sensors. In many cases, the issue is something simple. You just need to check it in the right order. Here’s how you can start:
Step 1: Remove Obstructions from the Sensor’s Path
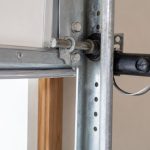
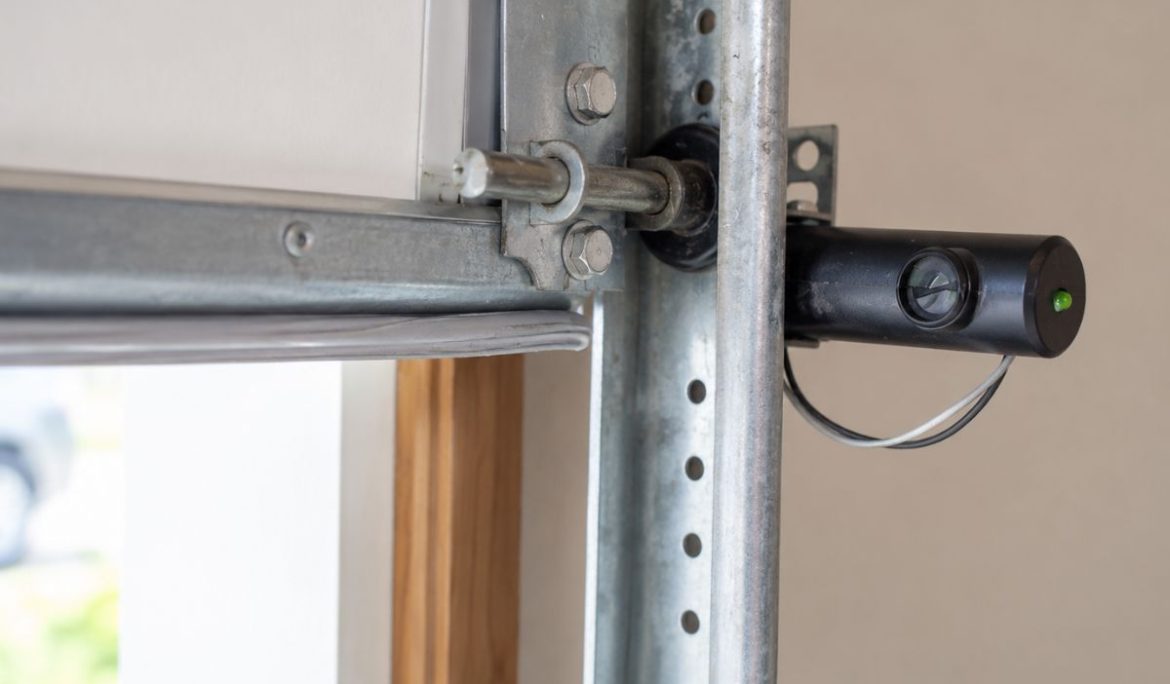
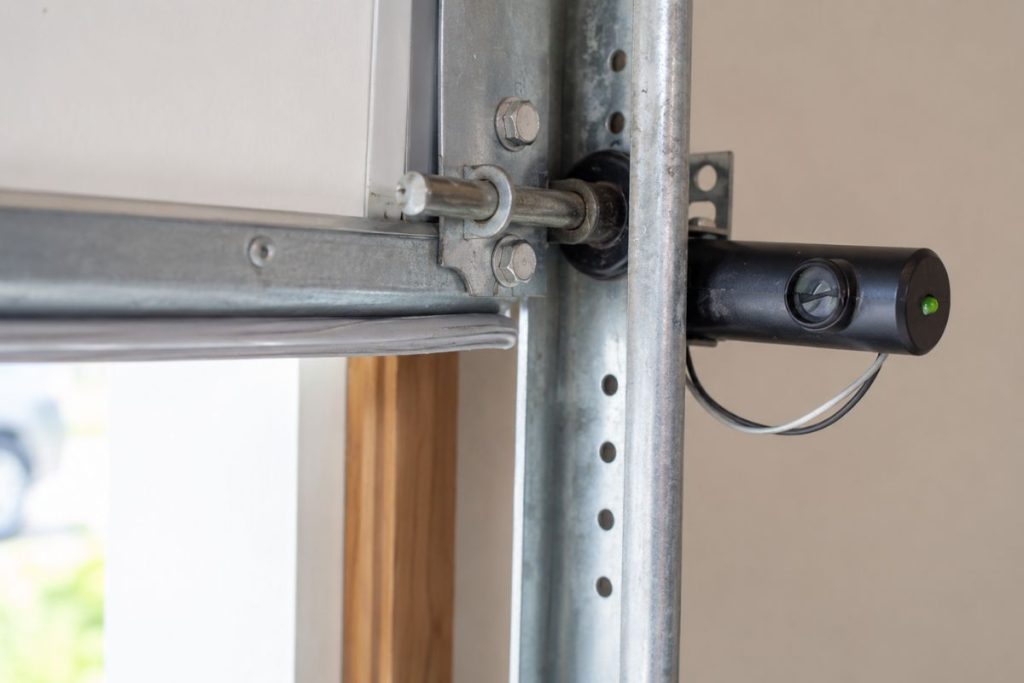
You can start by checking both garage door sensors. You will usually find them near the bottom of the door tracks, one on each side. Once you find them, look closely at the space between the two sensors. Leaves, dirt, boxes, tools, toys, or even a small cobweb can interrupt the signal.
When the signal is blocked, your garage door may stop or go back up before it fully closes. Move anything that is in the way. Then try closing the garage door again to see if it works properly.
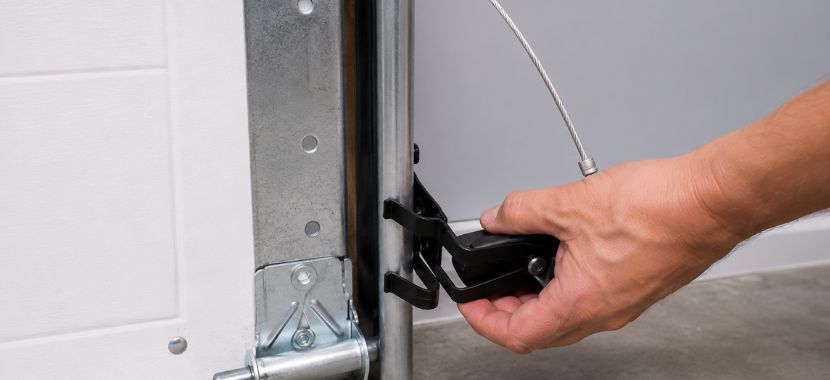
Step 2: Align the Sensors Properly
If nothing is blocking the sensors, the next thing to check is their alignment. Look at the small lights on both sensors. If one light is blinking, dim, or off, the sensors may be out of line. Gently adjust one sensor at a time until both lights stay steady. Once they are lined up, tighten the bracket so the sensor stays in place. Remember, garage door sensors need to face each other directly to work the right way.
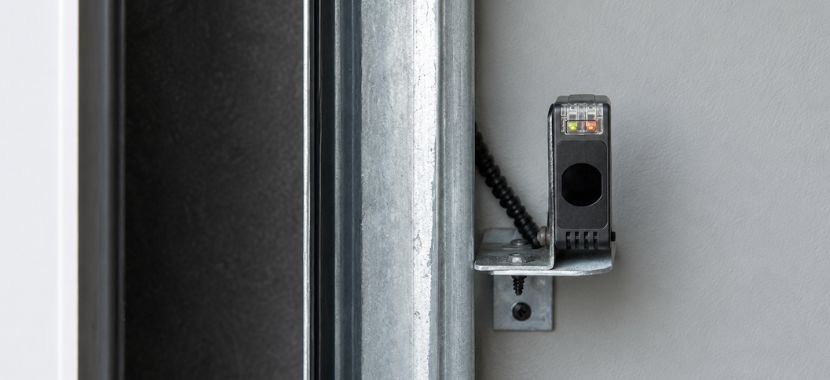
Step 3: Clean the Sensor Lenses
Dust, dirt, or cobwebs on the lens can affect the signal. To clear it, use a soft or dry cloth. to wipe both sensor lenses. Clean them gently so you do not move the sensors out of place. After cleaning, check the sensor lights again. If the lights stay steady, then try closing the garage door.
Step 4: Inspect the Wiring and Power Source
If cleaning the lenses does not fix the problem, check the wiring and power next. A loose wire or power issue can stop the sensors from working. For that, look at the wires connected to both sensors. Also, check for loose, damaged, or broken wires and make sure your garage door opener is plugged in and getting power.
Warning: Do not touch exposed wires. If you see damaged wiring, call a professional garage door repair technician.
Step 5: Reset the Sensors
If the sensors still don’t work after doing these steps, kindly try restarting the machine, as sometimes the garage door opener needs a simple refresh. To do it, unplug the garage door opener from the power source. Wait a short time, then plug it back in. Some garage door openers also have a reset button. You can check your owner’s manual to follow the right steps for your model.
After the reset, test the garage door again. If the door still won’t close after these checks, the sensors may not be the only problem. There could be an issue with the wiring, opener, track, or other door parts. In that case, calling a professional door repair service is the safer move.
Final Thoughts
In this blog, we discussed common signs of a faulty garage door sensor and simple checks you can do before calling for help. The main thing to remember is that your garage door sensor is there for safety, so when something feels off, you should not ignore it.
After you clean and align the sensors, whenever you see the sensor lights do not turn on, or the door keeps reversing, the issue may need professional help. You can contact Aron Windows and Doors. Their team will inspect the sensor, check the wiring, and help get your garage door working properly again.